This might be the simplest wreath I’ve ever created! Faux flowers are a great way to add some fall decor to your home that will last the entire season. Follow along to create a DIY fall wreath in less than ten minutes!
As an Amazon Associate I earn from qualifying purchases.
To get started, you’ll need a grapevine wreath. Amazon something similar that you could buy if you don’t already own one. Click here to view it. Pictured below is a grapevine wreath I’ve had for almost three years that I’ve decorated every season!
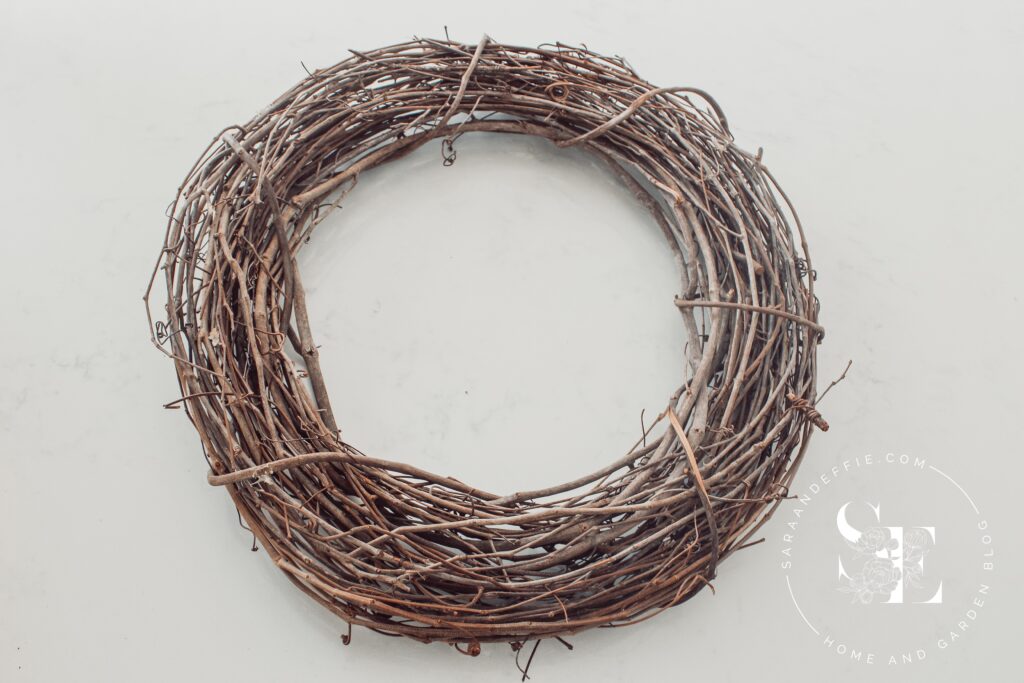
You could consider making your own grapevine wreath. Here is a tutorial I found that might be helpful. I’ve yet to try making my own wreath, but when I do I’ll be sure to post it! Do not use hot glue or any other form of adhesive on the wreath when decorating it, so that you can re-use the wreath each season.
Do not use hot glue on the grapevine wreath when decorating it. That way you can re-use it each season.
I saw some amazing faux flowers at the dollar store this year. You’ll need only a few stems in a neutral color palette to make this wreath. Creams, browns, and touches of gold. In the dollar store, you may not see these flowers right away. Look among all the colorful blooms to pick the neutral-colored flowers. I selected five stems to create this wreath. Each of the stems had multiple flowers or leaves.

Start by adding the darkest color to the center of the wreath. The brown sunflowers are eye-catching and unusual which makes it a great focal point. This has four flowers to one stem.

Tuck the stems behind the wreath to secure it. You can secure it with floral wire if you feel it’s needed but I didn’t. I like to do things quickly and the flowers felt pretty secure without the wire.
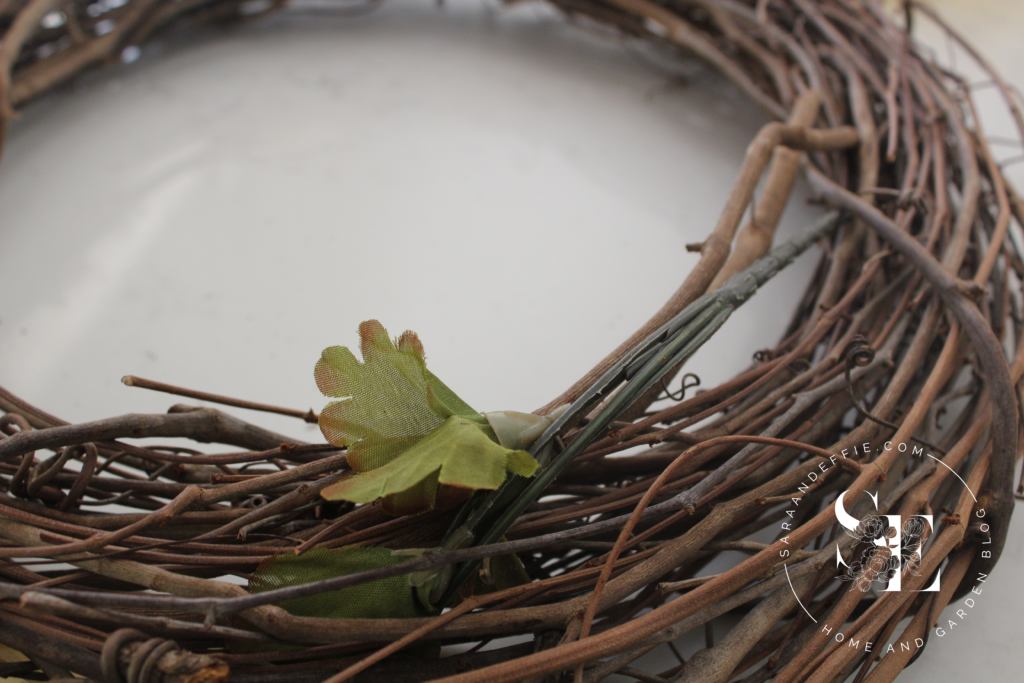
Place the lighter flowers next to the darker flowers for contrast. Two stems on either side, create balance. Keep tucking in the stems behind the wreath similar to the picture above. Since we are only using five stems you can do this really quickly!
Place the lighter flowers next to the darker flowers for a bit of contrast.

Finally, add in the leaves to complete the look. The neutral coloring on this wreath is really pretty! No one would suspect that these are flowers from the dollar store.
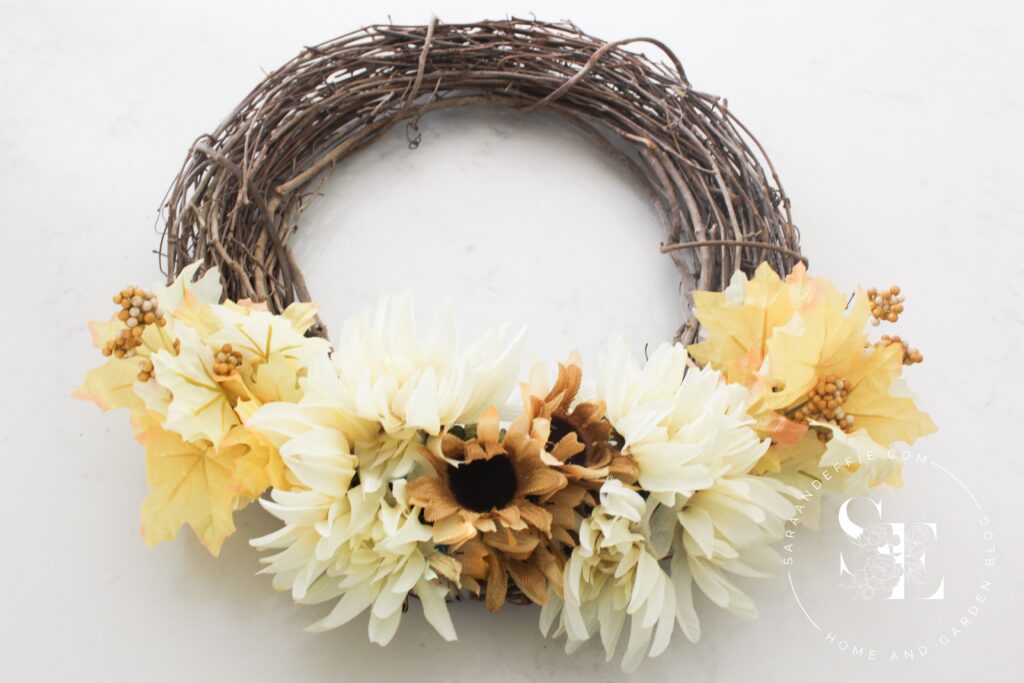
This is a perfect wreath for your front door. I hung a watercolor sign with similar coloring from the dollar store with it and it looks just perfect!
Hang a watercolor sign first and layer the wreath on top to complete the look.

I hope you enjoyed seeing how to create a DIY fall wreath in less than ten minutes. Let me know in the comments below if you like the wreath or if you tried it! Be on the lookout for how to re-purpose the grapevine wreath to create a Christmas wreath! I’ll be sharing that in November.
If you want more ideas on how to decorate for fall, you might like my post on creating a centerpiece with fall mums or my other post on white pumpkin decor!
Please share this post with your friends and family. Pin it on Pinterest and follow along on Instagram! Don’t forget to subscribe to the blog for more great updates! Thank you for stopping by!

Affiliate Disclaimer – As an Amazon Associate I earn from qualifying purchases. This site uses affiliate links to products, which means we may receive a small commission when you click on these links and make purchases. It’s of no additional cost to you and all opinions/product reviews are my own. Thank you for supporting this blog.

 CREATE A CITRUS FRESH TABLESCAPE
 CREATE AN EASY ROSE VIGNETTE!
 CREATE A PRETTY WILDFLOWER ARRANGEMENT
 FREE EBOOK- TIPS FOR ARRANGING SEASONAL FLOWERS